Showing posts with label faux finishes. Show all posts

Tuesday, July 28, 2009

Vickie’s Nail Salon

First, let me apologize for my lack of posting these past few months.  I have been enjoying my time with the kids being out of school.  That being said, I haven’t made the time to be on the computer or work much for that matter.  I’m trying to get back into the groove.  Less than three weeks until school starts again.

These pictures are of a nail salon I had the pleasure of doing a couple years ago.  The owner, Vicki is a great person.  She is very involved in our community and a great inspiration to any businesswoman.  I met her several years ago and we instantly hit it off.  It amazes me the amount of things she can pack into each day. 

After many years of being on Main Street, Wauconda her business was becoming too large for the space.  Vicki built a new facility with lots more room.  It’s got separate areas for the spa, facials, hair and nails.

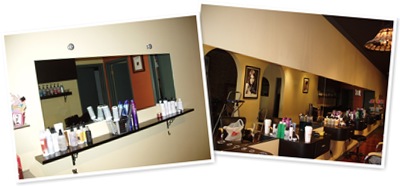
vickies manicure wall I gave the upper half of the walls a colorwash treatment in an eggplant color.  The lower half was textured and colored to give it a limestone finish.

This was my second time doing a commercial job.  I ran into some problems with the other contractors, that did the prep work and base coating.  The walls were to be primed and base coated prior to me starting.  Unfortunately, I found out the hard way that the walls weren’t actually primed before the base coat was applied.  After taping off the stones and applying the texture, I allowed it to dry.  When I started peeling the tape off, it was removing more than just the tape.  The paint and everything all the way down to the drywall was coming off.  It was a complete nightmare.  After several discussions with the contractors, we got confirmation that the walls were never primed.  This meant I had to patch the areas that were ruined and prime the walls again.  Oh yeah, and redo all the taping and stone work.  Once this was done the stones were colored to create the look of limestone.

vickie's pedicure wallspedicure area

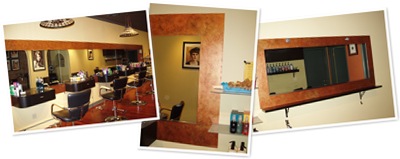
The wall behind the chairs is bronze with a turquoise colorwash.  I love this color combination.

vickie's copper wallThis back wall has tissue paper for texture.  Then I applied copper paint and colorwashed with more turquoise.

It was a relief to finish this project given the problems I encountered along the way.  It was quite a learning experience for sure.  It goes to show why the prep work is one of the most important parts of the job. 

Vickie’s is a place I visit frequently.  It’s where my family goes for all our beauty needs.  We recently had the pleasure of celebrating my daughters’ 7th birthday there.  She invited five of her friends and I invited some of mine and together enjoyed some pampering.

DSC_0032

Friday, May 8, 2009

My Current Project

Here is the house I have been working on for the past couple of weeks.  The homeowners have been remodeling their house and had some faux finishing done.  They weren’t happy with the way their last faux finisher did the dining room.  They contacted me to redo it.  I redid the silver stripes and completely changed the ceiling.  The ceiling had a sponged look before that didn’t compliment the walls at all. Sorry, I didn’t get any before picture of this room.  Here is the completed room.  I can’t wait to see what it looks like with the furniture in it. DSC_0067DSC_0064

I also repainted their bathroom.  It had a venetian plaster type finish.  I think they were going for a marble look, that didn’t turn out quite right.  So, I repainted it with a bronze linen type look.   After several days, the husband decided he didn’t like this either.  It’s too close to the wood tones, so I’ll be lightening it.


I was also asked to change the living room.  It’s a green plaster, but too much green for the homeowners.  I troweled some of the gold I used for the dining room ceiling over the green.  This toned down the green and also helped the two rooms flow a little better.

DSC_0171

DSC_0173


The after picture didn’t photograph very good.  The gold was still wet and looks a lot more blotchy than it actually is.  It has more of a subtle marble look to it.  I’ll have to get another picture of it when I go back.

I am also doing the bedroom wall that they didn’t like.  The headboard wall had a cloud-like finish on the upper half.  I had suggested to do a colorblock technique and incorporate the two different blues, some silver, brown/bronze and white.  Well, I got it drawn out and started painting it.  To my surprise the next day I got a call and the husband thinks it’s too contemporary.DSC_0003 DSC_0004


I must admit, this one was a little disappointing.  I feel it really looked nice with their headboard and bedding.  Oh well, it’s back to the studio to come up with another idea.

Sometimes, these things happen.  It’s hard for some people to visualize what an entire wall is going to look like from just a small sample.  I enjoy the challenge and look forward to finding the perfect solution for this room.  I’ll post more when it gets finished.

Tuesday, April 14, 2009

My Cabin Bathroom

bathroom floor1This is my bathroom.  I started this project because I wanted to test painting over linoleum.  I told my husband I wanted to paint tree stumps on the floor with leaves scattered around it.  His comment was “you want to do what”.  Fortunately, I’ve yet to do something that he hasn’t liked, so I’ve still the freedom to paint as I please. 


We have a cabin in Northern Wisconsin and I just love all the cabin decor you can find.  So, to go with my tree stumps I decided to make this my little cabin away from the cabin.

On the walls, I stenciled some dragon flies with Venetian Plaster.  Then, I applied three more coats of Venetian Plaster over top.  This makes them very subtle.  Can you see it next to my towel hook?bath5bath 1

bath 3


After the work was all done, I got to embellish the room with my cabin items.  I absolutely LOVE this room, it makes me smile and reminds me of Up North.

The only thing I STILL need to do is add a picture of our Cabin to the wall about the towel bar.  I haven’t decided if I want to paint one or just do a drawing.  After that’s done, this room will be perfect.

Monday, April 6, 2009

The Lindy’s project…

Here is some work I did at a restaurant in town.  The place started out as a little neighborhood bar.  A couple years ago, they did a huge renovation.  Now, it’s one of the most beautiful buildings in town (in my opinion).  It’s also got an amazing view of Bangs lake.

lindy's brick wall

This is the faux brick wall I painted along with the billboard sign with their logo.  It was a lot of fun painting the brick while the real brick layers were working on the brick columns shown in the same picture.


lindy's sign close up


This is a close up of the billboard I painted on the brick wall.  I woodgrained it and gave it an aged look.  We wanted it to look like an old sign.


lindy's columns


These columns behind the bar are also faux.  They wanted brick columns, but the bar wasn’t strong enough to hold real brick.  I got some pretty funny looks carrying in these brick columns.  People thought I was really strong.  It was pretty funny.


lindy's ceiling

Finally, here is a picture of the ceiling I did for them.  It’s got an aged patina look.  It really finishes off the space.

Luckily, I was able to work on it at home and have it installed by one of the workers.

This is one of those jobs that you don’t get much recognition from, because most people think it’s real and not painted.  A couple of the waitresses get a kick out of telling the customers that it’s actually paint and not real brick.

Keep your eyes open.  You never know you might be looking at something painted instead of the real thing.  That’s what makes faux finishing so much fun.

Thursday, March 12, 2009

Sadie Wellington Salon

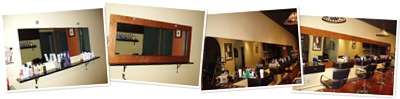
This is a salon I recently did some work in.  It has a very warm feeling when you walk into it.  One wall is exposed brick.  I just love the feeling exposed brick adds to a space.  They requested that I frame in the mirrors to bring some warmth to that side of the room.                                             

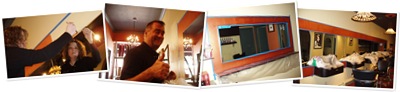
Before pictures of the two mirrors.  The larger mirror is 30ft. long and the smaller one is 5ft. long.

Here we are in action, applying the copper base for our faux finish.

Finally, here is the finished product.  After removing the tape, I stepped back to inspect the job.  I must say, this was the first time I ever got the feeling that the finish product had always been there.  It fits in so perfectly to the space and really frames the mirrors nicely.

These before and after pictures sure show how a faux finish can transform a space into something wonderful. 

If you are ever in the area, check of this salon.  Sadie Wellington Salon is located in Barrington, Illinois.   For more information about them, check out their website http://www.swsalon.com.

Thursday, February 19, 2009

Preparing for the Business Expo

Lately, I’ve been enjoying the opportunity to create some new samples, refinish some furniture and build some columns.  I’ve been coming up with new things to show at our local business expo. 

Last year was my first time participating in it and I was fortunate to win the price of “most creative booth”.  It was a very nice surprise.  However, I am feeling a little pressure this year to make sure it’s just as good if not better.P2050003

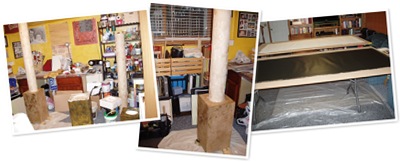
I’ve had the idea of building some faux columns.  I built the base out of wood and the column is pvc pipe.  Here is a picture of it before I’ve started painting it.  I’m testing it out in this spot, because I think I’ll keep them here by our patio door.  I think it’s the perfect solution, because we have no storage room.  They will fit in perfectly with the decor.

My studio has spilled over to the rest of the basement, because I was running out of room.  Here are some pictures of my very messy studio and some of the projects I’m working on.

As you can see I’ve started painting the columns.  I really like the way the actual columns look.  I’ve redone the bases several times, because I haven’t gotten the look I’m going for.  John keeps telling me all the columns he has seen, the base matches the column.  So… after several attempts of giving them a different look, I’ve given in to making them match the column.  I’ll post the pictures when they are finished. 

On the table, the black and white things are banners I’m doing faux finishes on.  I’m going to hang them in my booth.  I’ve got so many ideas of what I want to do, but only four panels.  It’s been tough deciding which finish to choose.  As of this morning, I’ve got one finished it’s black with bronze and gold (unless I add a stencil to it). I think what I’m going to do for the other three is: one as a wall of 12x12 slate tiles.   One is going to be a neutral colorwash, with a gold design.  The last one is going to be girly, but I’m not quite sure what.  I’m thinking purple or pink with flowers and glitter.  I love adding the sparkles for girls rooms.

I’ve also been working on some furniture, this is new for me.  The first table is a coffee table I got from a friend who was selling it at a garage sale.  I’ve always wanted to do a checkerboard on a table, so here is my version of that.  Also, I’ve posted the before picture of the table.

coffee table before

P2040001

Here is another little table I’m working on, it’s still not finished.  It’s getting close though.

P2060006

P2180006

Ok, I’ve still got lots of work to get done before next Saturday.  I better get to it.  I’ll post pictures of my booth when it’s set up.

Wednesday, February 4, 2009

Mead’s house.

Here is a project I did for some very good friends of mine.  I’ve known them for about as long as I’ve known my husband.  It’s my husbands’ best buddy from high school.  I’ve painted every bedroom in their house and one of the bathrooms.  Today, I’m going to just show you the bathroom and two of the bedrooms (the other three were just painted, no faux finishing).

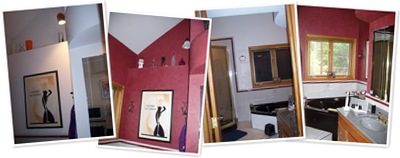
This bathroom is one they HATED.  It’s the bathroom off their master bedroom.  As you can see in the before pictures, it had plain white walls, with grey tiles and a burgundy accent tile.  Ideally, they would like to have gutted the entire thing.  However, since that wasn’t going to happen, I suggested “let’s just paint it”.  Our main goal was to make the burgundy tile work with the rest of the room.  Well, what better way to do that than make the walls burgundy.  I applied venetian plaster to the walls.  As you can see, it totally transformed the room.  I also painted the drywall around the tub a glossy black.  I think that made a big difference too. 

This is one of the most dramatic before and after examples I’ve got in my portfolio.  It was a lot of work; three coats of troweled on venetian plaster and a protective topcoat.  Absolutely worth it in the end.

This next room is the master bedroom.  It is just off the above bathroom. We wanted to make sure the bathroom and bedroom colors complemented each other.  For this one, I troweled on a base to give it some texture.  Then, I painted a base coat over the texture.  Finally, I did a colorwash to highlight the highs and lows of the textured walls.  As you can see it really warms up the room.  I just love the way these before and after shots look.  It’s amazing how it transformed the space from cold to warm and cozy.  And it was done with just a little faux finishing….. I love my job!

mead master 1 before

mead master 1 after


The most recent room I did for them was their daughter’s room.  This was really fun, because I got to do a surprise makeover of her room.  I was told she wanted orange walls and l think they said she liked purple and lime green too.  So, I went to IKEA to find some inspiration. 

I found a beautiful duvet cover and went from there.  I painted the walls a light orange (I felt like it was a big band-aid before the finishing touches were added).  I then painted the ceiling dark purple with a hand painted design in light green.  On one of the walls, I also painted some panels.  The panels were done the opposite of the ceiling, light green background with the design hand painted in purple.

The ceiling is definitely a one of a kind.  My neck was killing me by time I finished it.  If I ever do it again, I will used a stencil.  Oh, who am I kidding.  If someone asks, of course I’ll do it again.  It’s just like childbirth, you forget how much it hurts after awhile.  It looks really cool when you are laying on the bed looking up.  It was a successful makeover, she loved it.

Thank you to The Mead’s for giving me the freedom to “play” with their rooms.  I love you guys!

Saturday, January 17, 2009

Foil sample ideas...

Today, my plan is to play around and make some samples with my foils (I say play, because it really doesn't feel like work when I'm in the studio). I've got a couple ideas I want to work on.

First one is a sample for a job I'm bidding on. I need to create a frame to go around a 30' long mirror. My idea is to do a copper textured finish with a gold foil stencil.

Second one is for my very dear friend, Joyce. We saw this painting at the 2008 Salon.

Painting by: Lauren Childs

We decided that something like this would look awesome above her fireplace.


And finally, I want to create a sample with my clear halographic foil. I saw a picture of a finish in Gary Lord's book "It's Faux Easy with Gary Lord".

So, down to the studio I go. I'll post pictures of the completed samples.