Tuesday, March 31, 2009

Taxes, cleaning and painting…..

Ok, I’ve gotten sidetracked once again.  No, it hasn’t REALLY taken me this long to clean the studio.  I had the studio clean last week.  Then, I had my taxes than really needed to be done.  There was also a painting job thrown in the mix and preparing for kids getting a week off school for spring break.

P3190007

I can actually see what paints and supplies I’ve got now.  I love when it’s clean, but why doesn’t it ever last???????

  P3190006I must confess… part of the reason I didn’t post sooner is because I wash hoping to get the sides of this desk finished first.  I did get the panels stained.  I just haven’t been able to get them cut down to size.  One of these days I’ll get them done.  I did however build this rack to hold my sample boards and other items.

Hopefully your projects are getting done quicker than mine these days.  Soon, it’ll be even harder to stay inside.  I think spring is finally here after this last snow storm.

I FINISHED THE SIDES OF THE DESK…Finally!!!!

Sometimes all it takes is admitting you don’t know when you’ll get it done.  Yesterday while the kids had friends over playing, I finished the sides for the desk.  What as difference it makes.  Unfortunately, the kids broke my camera yesterday so I can’t take a picture yet.  If that is the worst that happens over spring break, it’s not too bad.  My camera has been slowly dying anyway, I guess they just helped it along.  Hopefully, I’ll be going out this weekend to pick a new one.  I really need to be able to take pictures of my paintings. 

Tuesday, March 17, 2009

My Studio – before the cleaning

I can’t believe I’ve let my studio get so messy.  It usually gets messy when I’m in the middle of projects, but this time it has gotten WAY out of control.  Look, you can’t even see my desk because it’s buried.P3160006

P3160007

P3160008One of my favorite things in the studio is my sink.  What a luxury it is to not have to run to the garage to clean my brushes.

So, my current project is to get this studio back in order.  I started on it yesterday and plan on finishing it today.  I need to have room so I can get started on some sample boards I need to do.  Also I am procrastinating a little. I’m supposed to be working on getting my tax stuff ready.  John if you are reading this, I promise I’ll work on the taxes tomorrow. 

I’ll post the completed project…hopefully later today.

Thursday, March 12, 2009

Sadie Wellington Salon

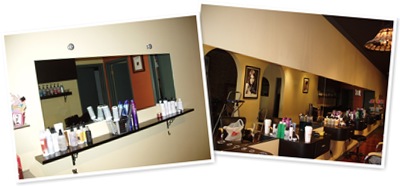
This is a salon I recently did some work in.  It has a very warm feeling when you walk into it.  One wall is exposed brick.  I just love the feeling exposed brick adds to a space.  They requested that I frame in the mirrors to bring some warmth to that side of the room.                                             

Before pictures of the two mirrors.  The larger mirror is 30ft. long and the smaller one is 5ft. long.

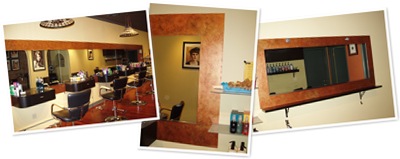
Here we are in action, applying the copper base for our faux finish.

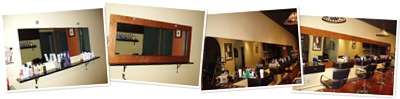
Finally, here is the finished product.  After removing the tape, I stepped back to inspect the job.  I must say, this was the first time I ever got the feeling that the finish product had always been there.  It fits in so perfectly to the space and really frames the mirrors nicely.

These before and after pictures sure show how a faux finish can transform a space into something wonderful. 

If you are ever in the area, check of this salon.  Sadie Wellington Salon is located in Barrington, Illinois.   For more information about them, check out their website http://www.swsalon.com.

Wednesday, March 4, 2009

My EXPO booth.

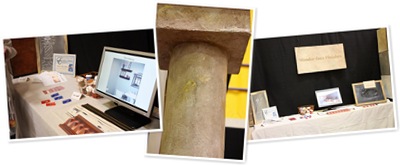
P2280008P2280009 


For weeks I’ve been creating columns, painting panels and refinishing furniture.  All this in preparation for our local business EXPO.  Well, last weekend was the EXPO and it was VERY successful.

I was very happy with the way my booth came together.  I’d visualized it in my head for months.  It’s awesome when my visions actually become reality (there are many times I can’t get that to work out).  I think this years booth looked much more put-together and professional than last years.  I’m already thinking of a few minor changes for next year, but for now it’s done.

photos by Joyce http://perfect-beginning.blogspot.com/

The EXPO was very busy this year.  There were 900 adults that came through the first day alone.  I never heard a final count for Sunday, but I would guess it had to be at least 500 people.  I got a lot of positive feedback and many leads.  I offered a drawing for a gift certificate toward a faux finish and got 33 people that entered.  Last year I think I only got 7 or 8 entries.  That’s a pretty good increase if you ask me.

I enjoy doing the EXPO, and love that my husband John joins me in the booth.  He really believes in me and it shows when he talks to people about my work. 

The booth is all packed up and ready to be put away until next time.  So… now the fun begins.  It’s time to start making those follow-up calls and schedule some appointments. 

Thursday, February 19, 2009

Preparing for the Business Expo

Lately, I’ve been enjoying the opportunity to create some new samples, refinish some furniture and build some columns.  I’ve been coming up with new things to show at our local business expo. 

Last year was my first time participating in it and I was fortunate to win the price of “most creative booth”.  It was a very nice surprise.  However, I am feeling a little pressure this year to make sure it’s just as good if not better.P2050003

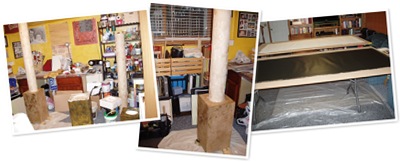
I’ve had the idea of building some faux columns.  I built the base out of wood and the column is pvc pipe.  Here is a picture of it before I’ve started painting it.  I’m testing it out in this spot, because I think I’ll keep them here by our patio door.  I think it’s the perfect solution, because we have no storage room.  They will fit in perfectly with the decor.

My studio has spilled over to the rest of the basement, because I was running out of room.  Here are some pictures of my very messy studio and some of the projects I’m working on.

As you can see I’ve started painting the columns.  I really like the way the actual columns look.  I’ve redone the bases several times, because I haven’t gotten the look I’m going for.  John keeps telling me all the columns he has seen, the base matches the column.  So… after several attempts of giving them a different look, I’ve given in to making them match the column.  I’ll post the pictures when they are finished. 

On the table, the black and white things are banners I’m doing faux finishes on.  I’m going to hang them in my booth.  I’ve got so many ideas of what I want to do, but only four panels.  It’s been tough deciding which finish to choose.  As of this morning, I’ve got one finished it’s black with bronze and gold (unless I add a stencil to it). I think what I’m going to do for the other three is: one as a wall of 12x12 slate tiles.   One is going to be a neutral colorwash, with a gold design.  The last one is going to be girly, but I’m not quite sure what.  I’m thinking purple or pink with flowers and glitter.  I love adding the sparkles for girls rooms.

I’ve also been working on some furniture, this is new for me.  The first table is a coffee table I got from a friend who was selling it at a garage sale.  I’ve always wanted to do a checkerboard on a table, so here is my version of that.  Also, I’ve posted the before picture of the table.

coffee table before

P2040001

Here is another little table I’m working on, it’s still not finished.  It’s getting close though.

P2060006

P2180006

Ok, I’ve still got lots of work to get done before next Saturday.  I better get to it.  I’ll post pictures of my booth when it’s set up.

Tuesday, February 10, 2009

My little painters.

I came across these pictures while searching through my disks of old photos.  I can laugh about it now, but at the time it was a nightmare.

We live on a hill, so we’ve got this cement wall outside our garage.  I suppose it’s to keep the hill in place, but it’s quite ugly.   One day, I was playing around and painting it to look like limestone.  I used those little bottles of acrylic paint you get at the craft store, mixed with a little glaze.  When I started it, I thought it would come off when it rained, so I was just testing things out to see how it would look.  Well, to my surprise two years later it was still there, unfinished and looking like crap. 

So, one day while I was doing some painting in the garage, Jake and Jess wanted to do some painting too.  This is nothing unusual, every time I paint they want to paint too.  I decided what the heck, I’ll let them paint the cement wall.  You can see some of the paint got on the wall. 

We (probably more me than John) decided just let them have fun.  It’s nice outside, we can just hose them off when they are done.  Yeah right!  This paint dried on them and it was a total nightmare to get off.  But look how much fun they had doing it.

Jess looks like a little boy here with her short hair and no shirt on.  I think we had two summers straight where she went topless.  Ahhh, to be a carefree little girl.  She’s six now and won’t even get changed without closing her door now.  I’m sure one day she’s going to hate these pictures, but they are so cute.

Wednesday, February 4, 2009

Mead’s house.

Here is a project I did for some very good friends of mine.  I’ve known them for about as long as I’ve known my husband.  It’s my husbands’ best buddy from high school.  I’ve painted every bedroom in their house and one of the bathrooms.  Today, I’m going to just show you the bathroom and two of the bedrooms (the other three were just painted, no faux finishing).

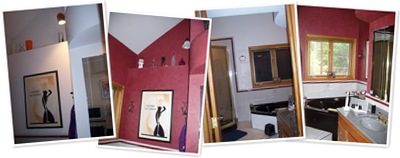
This bathroom is one they HATED.  It’s the bathroom off their master bedroom.  As you can see in the before pictures, it had plain white walls, with grey tiles and a burgundy accent tile.  Ideally, they would like to have gutted the entire thing.  However, since that wasn’t going to happen, I suggested “let’s just paint it”.  Our main goal was to make the burgundy tile work with the rest of the room.  Well, what better way to do that than make the walls burgundy.  I applied venetian plaster to the walls.  As you can see, it totally transformed the room.  I also painted the drywall around the tub a glossy black.  I think that made a big difference too. 

This is one of the most dramatic before and after examples I’ve got in my portfolio.  It was a lot of work; three coats of troweled on venetian plaster and a protective topcoat.  Absolutely worth it in the end.

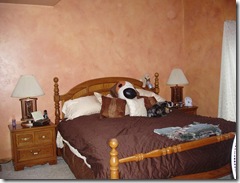
This next room is the master bedroom.  It is just off the above bathroom. We wanted to make sure the bathroom and bedroom colors complemented each other.  For this one, I troweled on a base to give it some texture.  Then, I painted a base coat over the texture.  Finally, I did a colorwash to highlight the highs and lows of the textured walls.  As you can see it really warms up the room.  I just love the way these before and after shots look.  It’s amazing how it transformed the space from cold to warm and cozy.  And it was done with just a little faux finishing….. I love my job!

mead master 1 before

mead master 1 after


The most recent room I did for them was their daughter’s room.  This was really fun, because I got to do a surprise makeover of her room.  I was told she wanted orange walls and l think they said she liked purple and lime green too.  So, I went to IKEA to find some inspiration. 

I found a beautiful duvet cover and went from there.  I painted the walls a light orange (I felt like it was a big band-aid before the finishing touches were added).  I then painted the ceiling dark purple with a hand painted design in light green.  On one of the walls, I also painted some panels.  The panels were done the opposite of the ceiling, light green background with the design hand painted in purple.

The ceiling is definitely a one of a kind.  My neck was killing me by time I finished it.  If I ever do it again, I will used a stencil.  Oh, who am I kidding.  If someone asks, of course I’ll do it again.  It’s just like childbirth, you forget how much it hurts after awhile.  It looks really cool when you are laying on the bed looking up.  It was a successful makeover, she loved it.

Thank you to The Mead’s for giving me the freedom to “play” with their rooms.  I love you guys!